8. Accessing the GX device
The GX device can be accessed using a smartphone, tablet, or computer via the Remote Console. This is the main interface for configuring and monitoring the GX device.
Access methods by device type
Access type | Venus GX | Cerbo GX / Cerbo-S GX | Ekrano GX | |
|---|---|---|---|---|
VictronConnect via Bluetooth[3] | - [1] | Yes | Yes | |
Yes | Yes | Yes | ||
Yes | Yes | Yes | ||
VRM Portal [2] | Yes | Yes | Yes | |
[1] The VGX does not have built-in Bluetooth. Add Bluetooth support using a USB Bluetooth dongle. [2] VRM access requires the GX device to be connected to the internet. [3] Bluetooth is limited to initial setup and network configuration only. It cannot be used to access Remote Console or connect to other Victron products (e.g. SmartSolar chargers). For connecting to other Victron products, see Connecting Victron products. | ||||
8.1. Using VictronConnect via Bluetooth
If you’re just getting started with VictronConnect, we recommend reading the VictronConnect manual for a full overview.
Download the latest version of the VictronConnect app to your Bluetooth compatible device (mobile phone, tablet, or laptop - Windows PCs are not supported), and ensure Bluetooth is enabled.
Ensure the Cerbo GX is powered on and the Bluetooth LED is blinking.
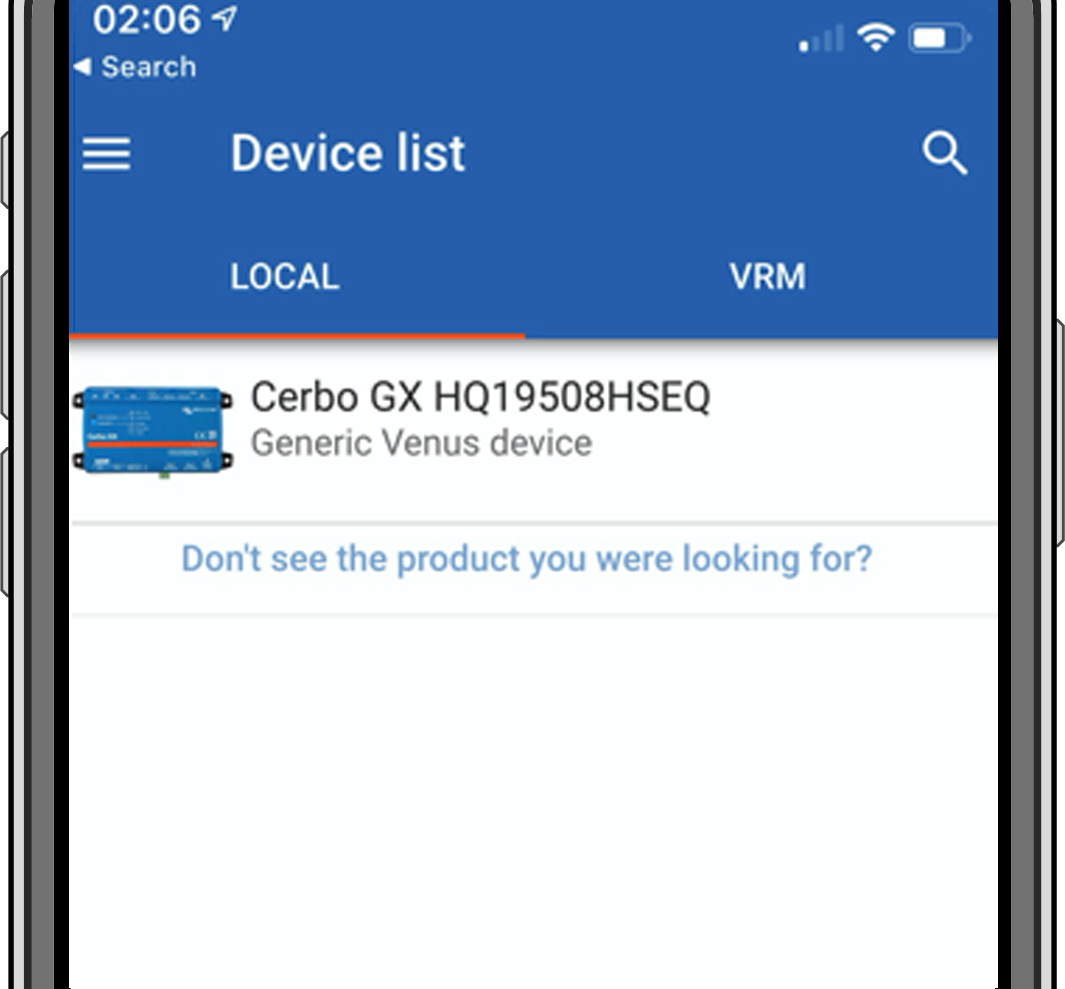
Open the VictronConnect app within 10 meters of the Cerbo GX and wait for nearby devices to be discovered.
Once discovered, click or tap on the Cerbo GX.
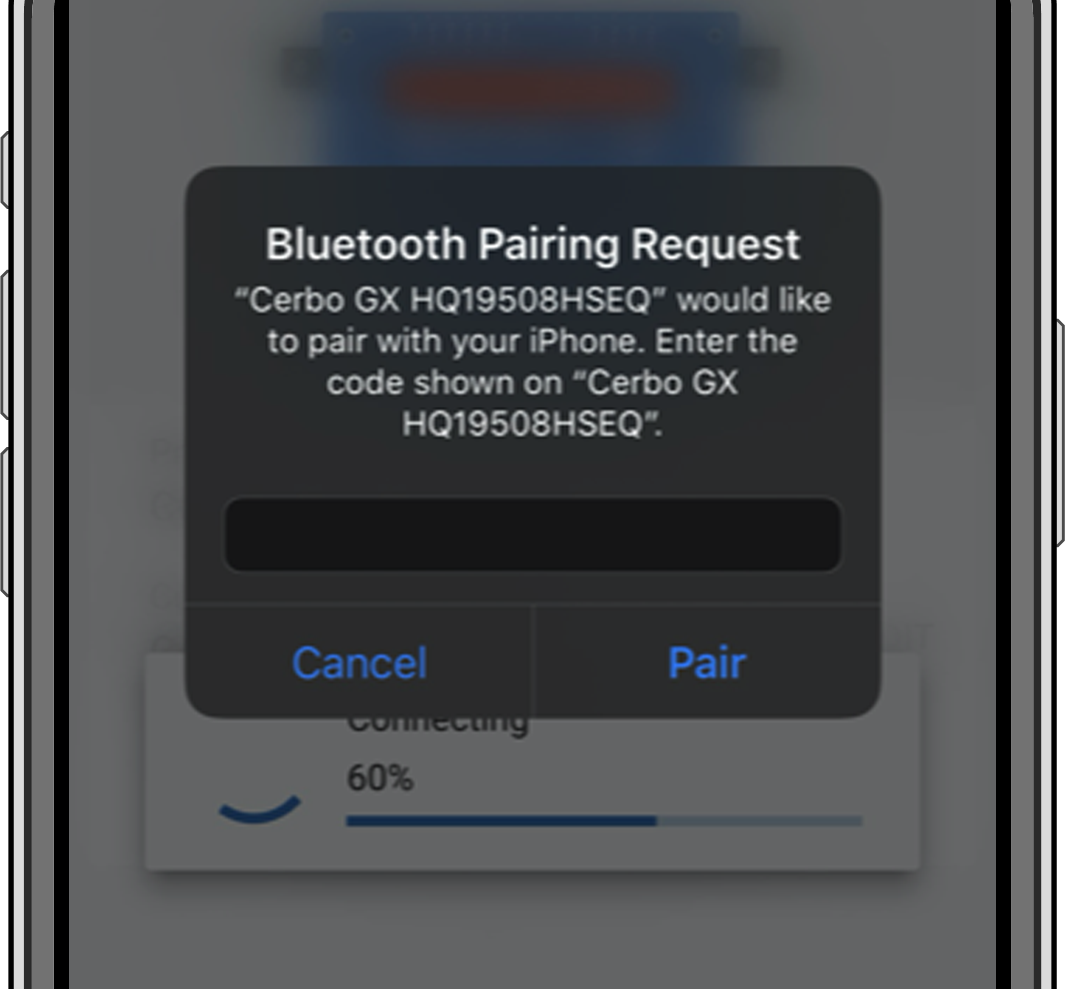
On first connection, you will be prompted to enter a Bluetooth PIN code.
For GX devices with a serial number earlier than HQ2242, the default PIN is 000000. For devices with serial number HQ2242 or later, a random 6-digit PIN is printed on the label (located on the back of the GX device).
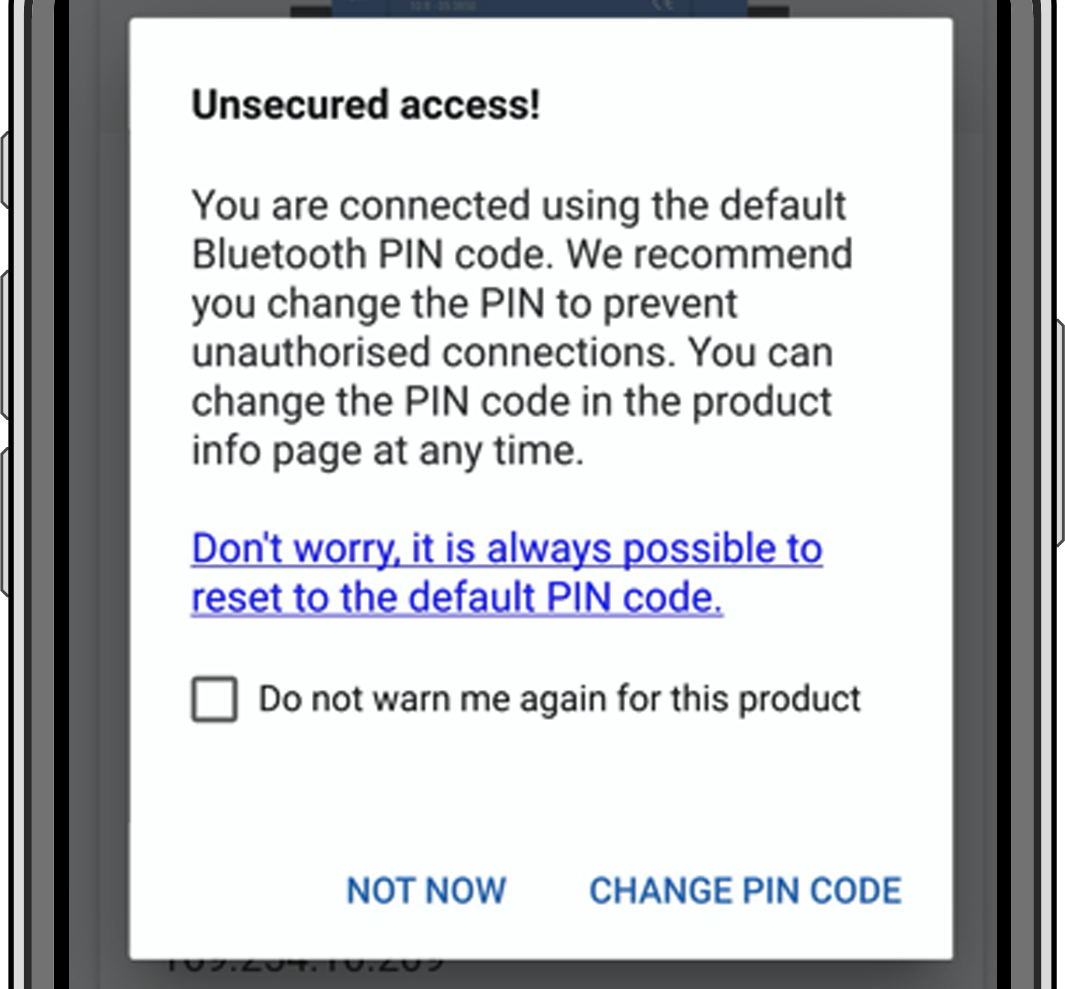
If your device uses the default PIN, you will be asked to change it to a more secure, unique code. Be sure to store your new PIN code in a secure place.
 |  |  |
From the main device screen in VictronConnect, you can:
Change network and Ethernet settings
Enable or disable the built-in WiFi Access Point
Access your system on VRM
Open the Remote Console (requires connection to a local WiFi network or the device’s WiFi AP)
To access network settings, tap the cogwheel icon.
 |  |  |
Limitiations
Bluetooth is only used for initial connection and basic networking setup. It cannot be used to connect to other Victron products (e.g. SmartSolar charge controllers). To connect to other Victron products, refer to the Connecting Victron products chapter.
8.2. Accessing via built-in WiFi Access Point
This method requires the VictronConnect app to be installed on your smartphone, tablet, or laptop.
Steps to connect automatically via the QR Code:
Locate the QR code sticker on the side of the Cerbo GX
Scan the QR code using your phone's camera function, or a QR code scanning app
If supported by your phone, this will prompt you to connect you to the WiFi Access point
Once connected, open VictronConnect
Select the GX device from the list
Open the Remote Console
Steps to manually connect:
Stand close to the Cerbo GX, no further than a few meters away.
Open the WiFi settings on your phone, tablet, or laptop.
Look for a network name like Venus-[serial_number-xxx].
Connect using the WiFi key, printed both on the side of the box and on a card included in the plastic bag. Keep this key stored securely.
Launch VictronConnect, which will start scanning the WiFi network automatically.
Once found, select the GX device from the list.
Open the Remote Console
Notes
If you cannot use VictronConnect, you can use a web browser and navigate to the IP address http://172.24.24.1 or http://venus.local
For additional security, the WiFi Access Point can be disabled: Navigate to Settings → Connectivity → Wi-Fi → Create access point in the Remote Console.
Instruction video
Watch the step-by-step instruction video on how to connect to a GX device using the VictronConnect app:
8.3. Accessing the Remote Console via local LAN/WiFi Network
This section explains how to access the Remote Console when the GX device is connected to a local network via Ethernet or a configured WiFi connection.
An internet connection is not required, only a working local network.
Once connected, connect to the GX device by running the VictronConnect app on a phone, tablet or laptop. Alternatively, you can also connect to the GX device via a web browser by entering venus.local in the address bar.
Note that it will need to be connected to the same computer network as the Cerbo GX.
This video shows how it is done.
8.3.1. Alternative methods to find the IP address for Remote Console
If VictronConnect cannot be used, the following methods can help you find the IP address of the Cerbo GX for Remote Console access:
Link Local Address - venus.local
You can access the GX device by entering venus.local or http://venus.local in a web browser, provided your computer is connected to the same local network.
IP Address via VRM Portal
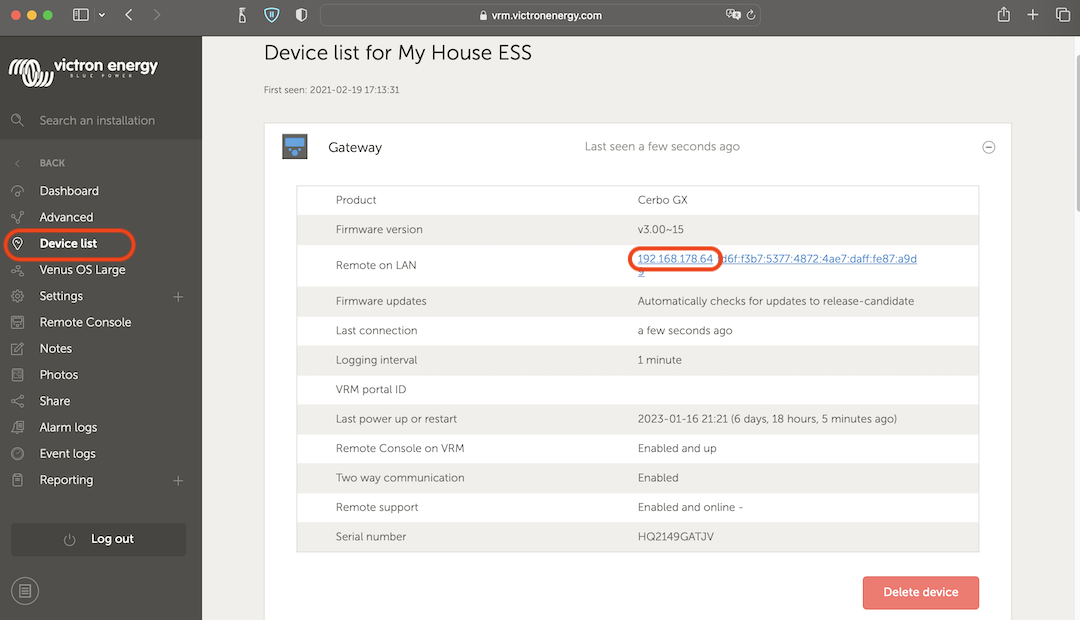
If the GX device is connected to the internet and registered on the VRM Portal, you can find its IP address:
Go to the Device list on your installation page
The IP address will be listed there
 |
Local Network Discovery (Windows only)
If you are on the same local network (e.g. at home), and using Microsoft Windows, you can locate the GX device using Network Discovery (UPnP):
Open File Explorer and navigate to the Network section
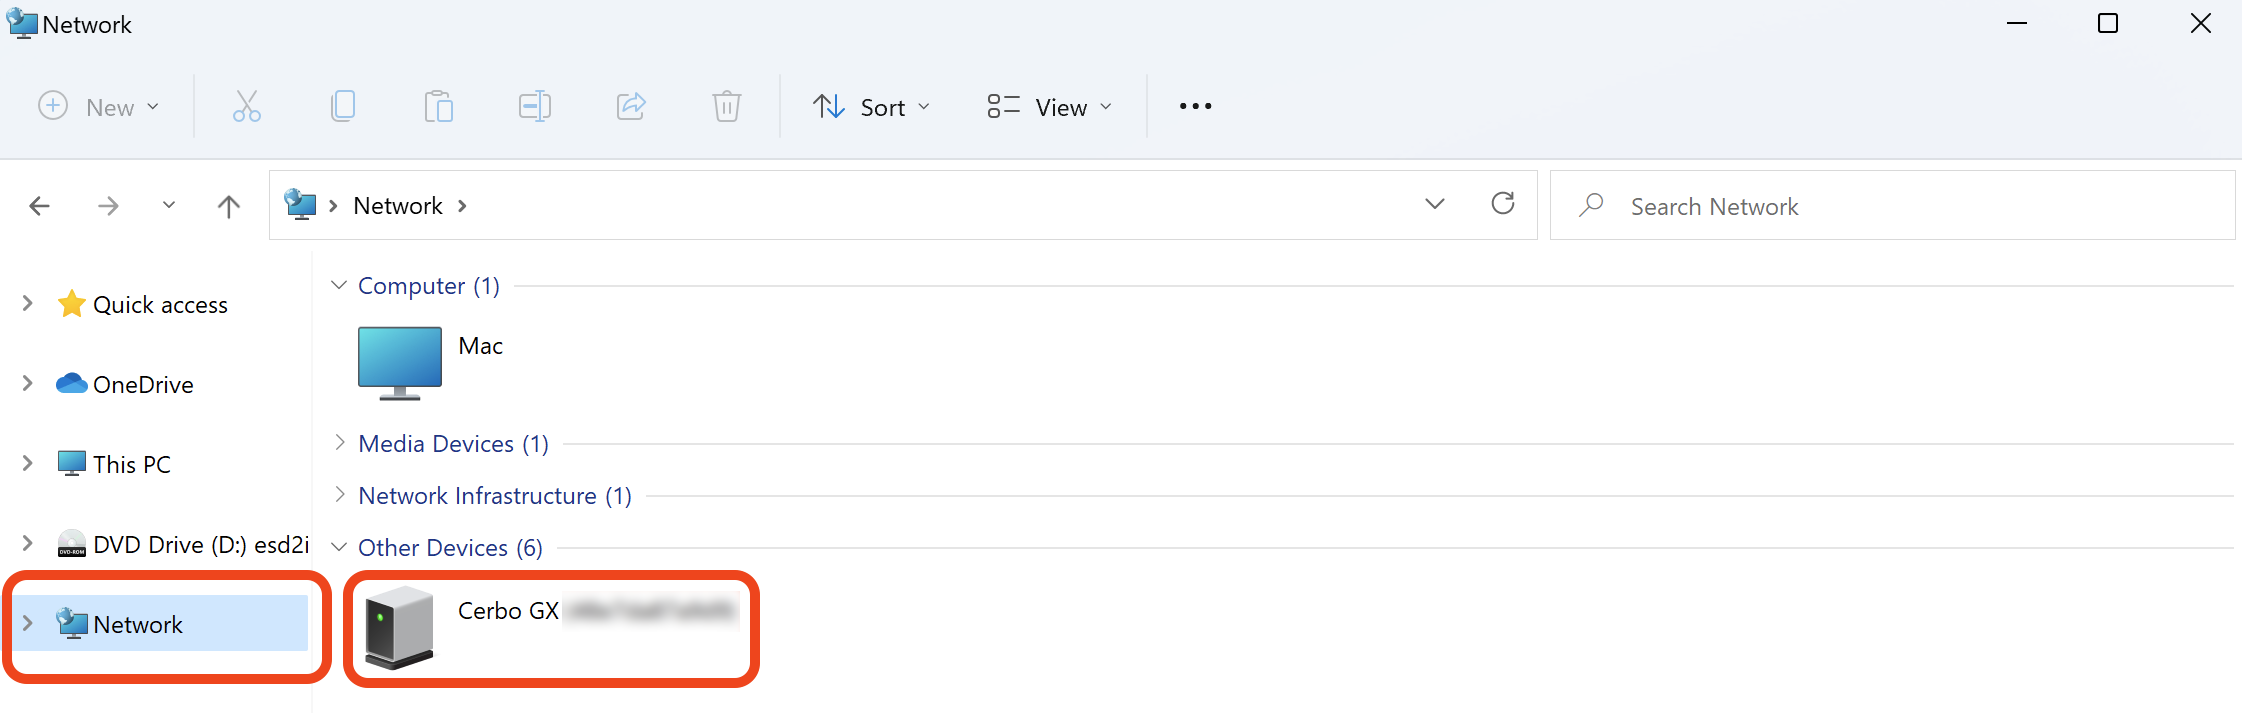 |
Double-clicking the GX device icon will open up Remote Console on LAN.
To view the IP address: Right-click the icon → Properties
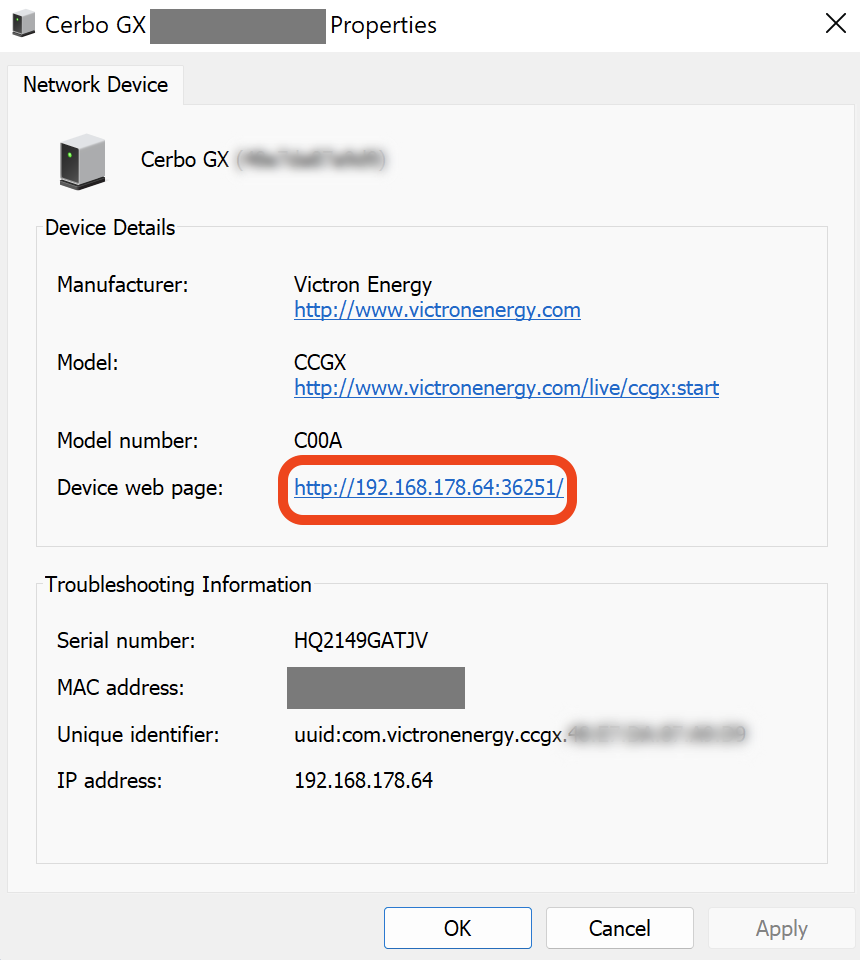 |
8.4. Accessing via VRM
This method requires an active internet connection for both the GX device and the phone, tablet, or computer accessing it. For a new installation, connect the GX device to the internet using an Ethernet cable.
Step-by-step instructions:
| 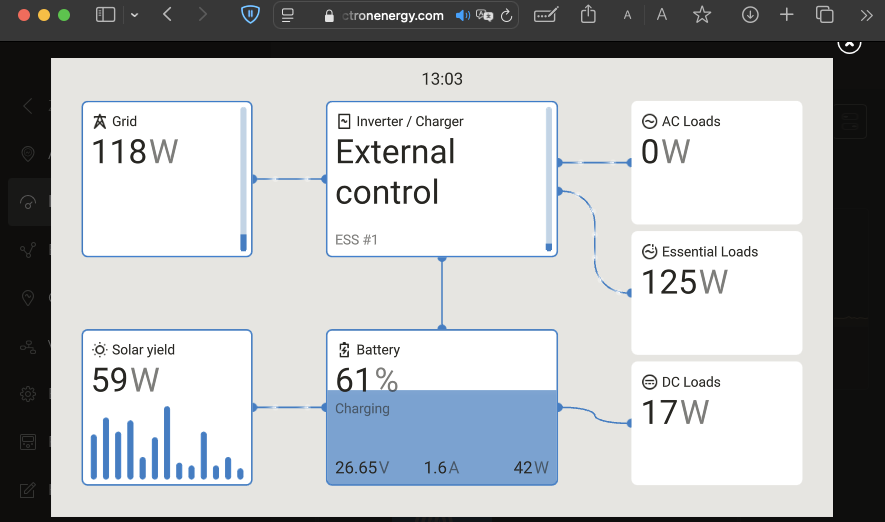 |
For more technical details and troubleshooting, see: Remote Console on VRM - Troubleshooting.